Your First Month With a 3D Printer: 15 Beginner Projects That Teach You Something
A new printer, hundreds of thousands of free models online, and one question: what should you print first? Instead of printing at random, it pays to follow a plan. Each of these 15 projects teaches you a specific skill, from your first test cube to multicolor printing. Spread over four weeks, you end up with things you actually use and a printer you understand.
Key takeaways
- Start with a print that takes less than an hour. A quick success matters more than an impressive project.
- PLA works for almost everything. Only in the bathroom, and for parts that get wet or warm, is PETG the better choice.
- Every project trains something: bed adhesion, overhangs, tolerances, wall thickness. You learn while printing instead of just collecting parts.
Three things first
- Check your build plate size. These projects fit on a plate of about 220 × 220 mm (8.7 × 8.7 in) or larger. On smaller plates, such as 180 mm (7 in), scale the models down in the slicer or pick smaller versions; only the card box (No. 11) gets tight.
- Use PLA. It forgives mistakes and prints reliably. Where another material makes sense, it is mentioned with the project.
- Start short. The prints in week one take between 20 minutes and a little over an hour. If something goes wrong, you haven’t lost much.
You can find the models for free on platforms such as Printables, MakerWorld or Thingiverse. Our guide to free 3D models compares the sites and explains what the licenses allow. Search terms like “toothbrush holder” or “dice tray” bring up plenty of results.
The 15 projects at a glance
| No. | Project | Print time (approx.) | Material | Supports | What you learn |
|---|---|---|---|---|---|
| 1 | Mini calibration cube | 20 min | PLA | None | Dimensional accuracy, adhesion, bed height |
| 2 | Bookmark | 25–40 min | PLA | None | Thin walls, flat parts |
| 3 | Headphone hook | 45–60 min | PLA / PETG | None | Overhangs, cantilevers |
| 4 | Toothbrush holder / soap dish | 1–2 h | PETG | Few | Choosing a material for moisture |
| 5 | Succulent pot | 1–3 h | PLA / PETG | None | Vase mode |
| 6 | Tea light cover | 1–2 h | PLA | None | Lattices and patterns |
| 7 | Seasonal decorations | 30 min – 2 h per piece | PLA | Few | Fine details |
| 8 | Photo stand | 1–2 h | PLA | Few | Angled surfaces, slot tolerance |
| 9 | Mini trophy | 1–2 h | PLA | Few | Raised lettering, color separation |
| 10 | Dice tray | 1–2 h | PLA / PETG | None | Corners, even wall height |
| 11 | Card box | 4–8 h | PLA / PETG | Few | Lids, latches, large surfaces |
| 12 | Shape sorter puzzle | 2–3 h | PLA | Few | Fits and tolerances |
| 13 | Kid’s room door sign | 1–3 h | PLA | None | Lettering and multicolor printing |
| 14 | Jewelry dish | 45–90 min | PLA / silk PLA | None | Thin walls, curved surfaces |
| 15 | Glasses stand | 1–2 h | PLA / PETG | Few | Curves, angles |
Times are estimates and depend on the printer, the size and your settings.
Week 1: quick wins to get started (projects 1–3)
1. Mini calibration cube
This is your first print. The 20 mm cube is done in about 20 minutes and immediately shows you three things: whether the dimensions are right, whether the first layer sticks and whether the bed is set up well. Run a finger over the top: if it is smooth and flat with sharp edges, your printer is ready. Warped corners or a rough surface tell you to adjust first. Our guide explains your first print step by step, and the troubleshooting guide helps if something looks off.
2. Bookmark with a name
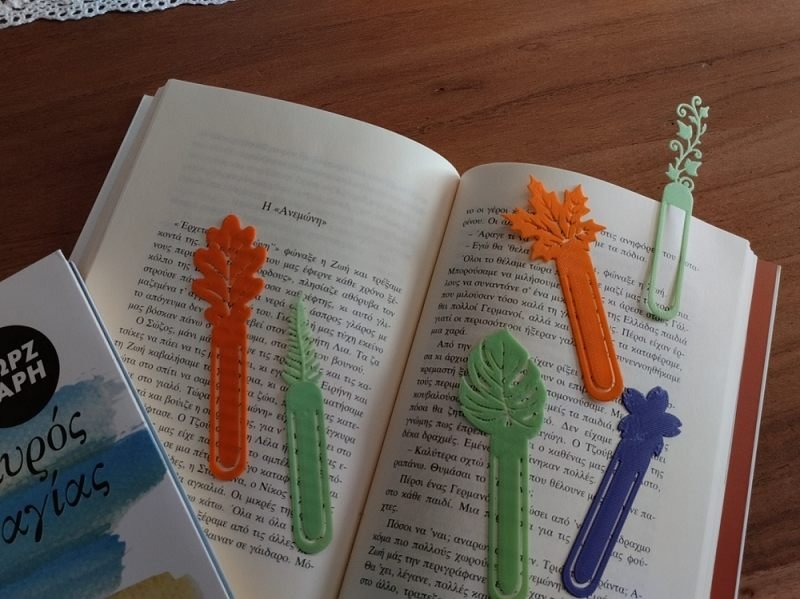
Flat, fast and easy to give away: a bookmark with a name, a quote or a cut-out pattern. You practice thin walls and bed adhesion on flat parts. With a multicolor system you print the body and the lettering in two colors; without one, you pause the print and swap the filament by hand.
3. Headphone hook for the bed or desk
A hook that clips onto the edge of a desk or bed keeps your headphones within reach. The arm sticks out with nothing underneath, so it prints as an overhang without supports. Once that works cleanly, you can print all kinds of holders.
Week 2: around the house (projects 4–6)
4. Toothbrush holder or soap dish
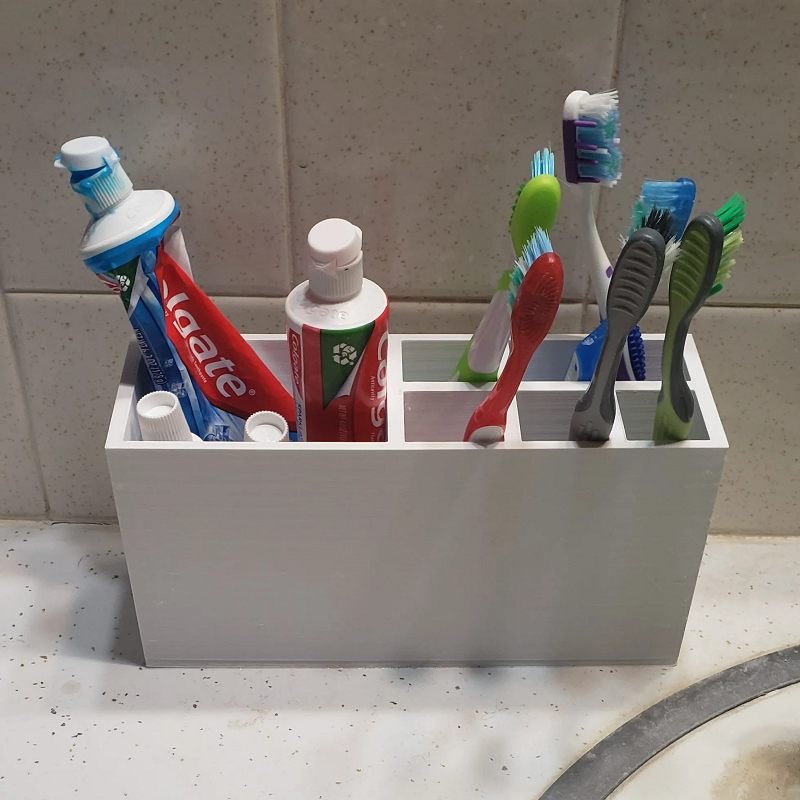
A holder with slots or a soap dish with drainage grooves tidies up the bathroom. Print it in PETG rather than PLA: a bathroom is constantly humid and warm, PLA can deform there, while PETG stays in shape. The materials section of our guide explains the differences.
5. Succulent pot with a drainage hole
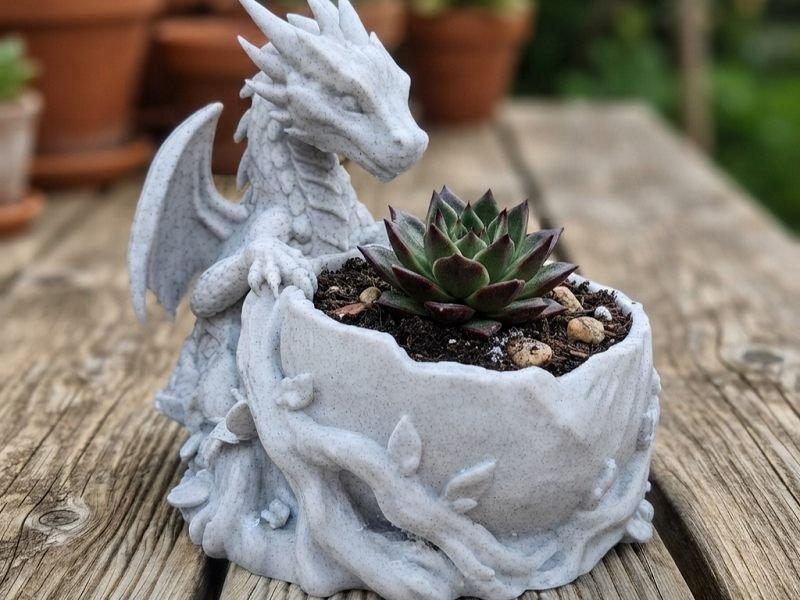
A small pot for a succulent or houseplant with a hole in the bottom so the roots don’t rot. This is where you discover vase mode in the slicer: the model is printed as one continuous wall, which is faster and looks smoother. PLA is fine indoors; for a balcony or patio, use PETG.
6. Patterned tea light cover
A lattice or geometric cover that fits over an LED tea light and throws light and shadows onto the wall. It looks complicated but isn’t. Safety: use LED tea lights only, never a real flame. PLA and heat don’t mix.
Week 3: gifts and game night (projects 7–11)
3D printed gifts work when they are personal. The first three print quickly and cost only a few dollars in material; the two game projects get used at every game night.
7. Seasonal decorations
Christmas ornaments, Halloween decorations, Easter eggs or lanterns: seasonal models are popular, and beginners often overlook them. Start a few weeks before the holiday so you have time to print a set. Plan 30 minutes to two hours per piece.
8. Desk photo stand
A small angled stand with a slot for a 4 × 6 in photo. It is unassuming, yet it gets used every day. You learn to print angled surfaces and to plan slots with the right tolerance.
9. Mini trophy or personal award
A small trophy or medal with a name and message in raised lettering, for example gold letters on a dark base. With a multicolor system it all comes out of one print, without painting. The project looks harder than it is, which makes it a great effort-to-effect ratio.
10. Dice tray
A flat tray with a low rim so the d20 doesn’t roll off the table. You practice corners and even wall heights, which helps later with bigger parts.
11. Card box for trading cards
A box with a hinged or snap lid for 60 to 100 sleeved cards, for games like Magic or Pokémon. You learn lid and latch geometry, tolerances and printing large, flat surfaces. On small build plates you may have to print it in two parts.
Week 4: family and everyday helpers (projects 12–15)
12. Shape sorter or letter puzzle
A board with cut-outs (square, circle, triangle, star) and matching pieces. This is where you learn tolerances: the pieces must slide in without rattling. Safety: we advise against homemade toys for children under three. They are not tested to toy safety standards such as ASTM F963, the surface has ridges, and small parts can be swallowed. For older kids, a puzzle like this is a nice introduction to STEM topics.
13. Kid’s room door sign
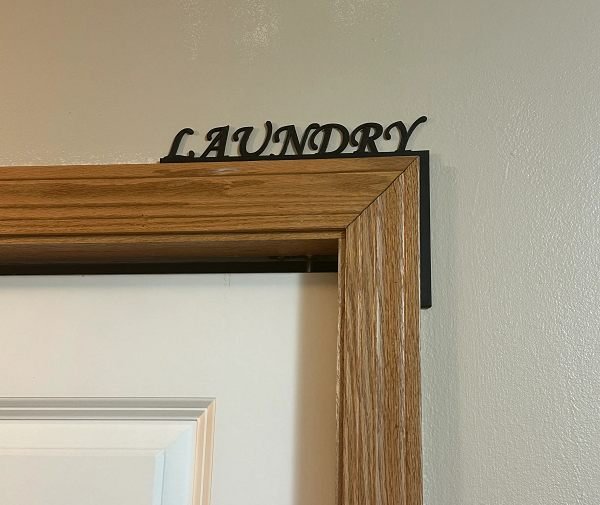
A wall sign with the child’s name in rounded letters and a symbol such as a dinosaur or a rocket. With a multicolor system you print the name, the symbol and the background in three colors in one go; without one, you pause the print to change colors. If you can’t find the right symbol, some platforms offer AI tools that turn a photo into a model.
14. Jewelry dish
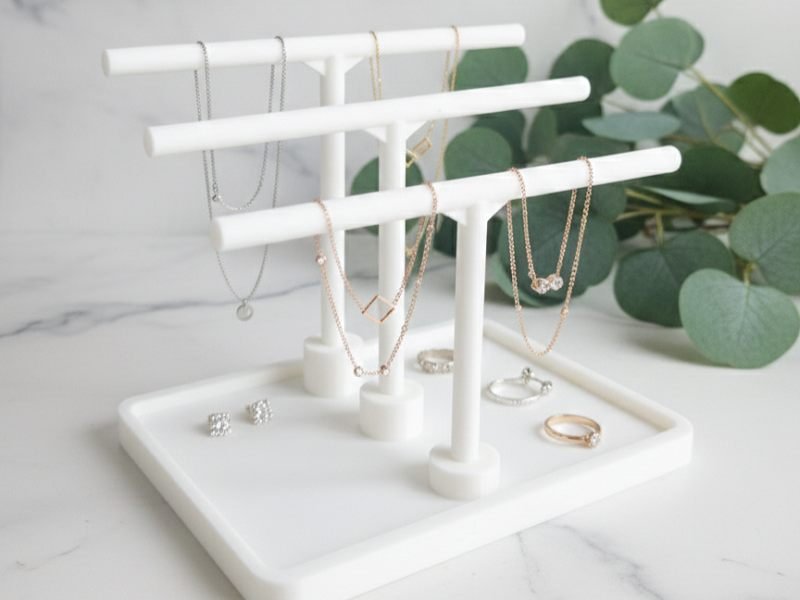
A flat dish for earrings and rings, hexagonal, with a wavy rim or shaped like a flower. You practice thin walls and curved surfaces. With silk PLA the surface turns glossy and looks more bought than printed.
15. Glasses stand
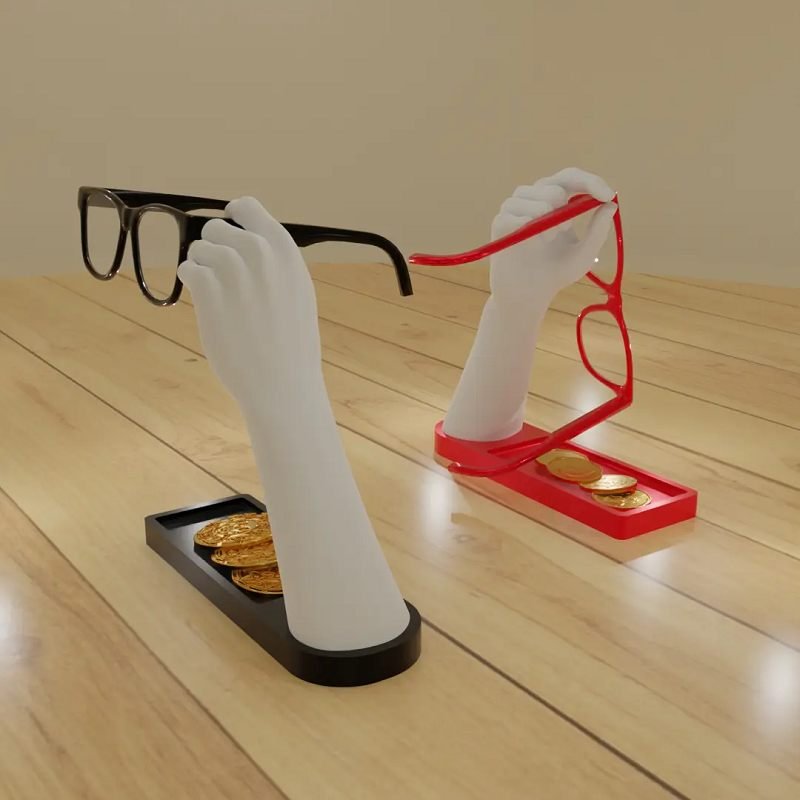
A stand with two curved arms that holds your glasses by the temples: off the table, off the floor, no scratches on the lenses. It trains curves and angles and is one of those things you didn’t know you needed.
Which printer makes the start easier?
None of these projects needs a complicated setup. Still, the right printer removes a lot of beginner frustration. Look for:
- Pre-assembled: unpack, load filament, print.
- Automatic calibration: the printer handles bed leveling and nozzle height, so there is nothing to adjust between prints.
- Camera with failure detection: it spots “spaghetti” failures and stops half a spool from ending up in the trash.
- Quiet operation: useful if the printer sits in a living space and prints overnight.
- Multicolor system (optional): for the bookmark, trophy and door sign in a single print.
Which models meet these points is shown in our best 3D printers for beginners, and the printer finder filters by budget and features.
Your four-week plan
| Week | Projects | Goal |
|---|---|---|
| 1 | Calibration cube, bookmark, headphone hook | Get to know the printer, first successes |
| 2 | Toothbrush holder, pot, tea light cover | Material choice and slicer features |
| 3 | Seasonal decorations, photo stand, trophy, dice tray, card box | Gifts, tolerances, bigger parts |
| 4 | Shape sorter, door sign, jewelry dish, glasses stand | Fits, curves, multicolor printing |
You don’t have to print everything. Pick one or two projects per week that you actually need or want to give away. For more ideas, see the 30 easy prints in our guide to free 3D models.
FAQ
How long does the first print take?
The mini calibration cube takes about 20 minutes. Add about a quarter of an hour for setup, heating up and removing the part.
Why PETG in the bathroom?
Bathrooms are constantly humid and warm. PLA can deform there, while PETG stays in shape and lasts longer.
Are homemade 3D printed toys safe?
Not recommended for small children: they are not tested to toy safety standards, the surface has ridges, and small parts can be swallowed. For older kids, a puzzle is fine if you make sure the edges are smooth.
Do I need a multicolor system to start?
No. All projects work in a single color. A multicolor system makes the bookmark, trophy and door sign especially nice, but it is only an extra.
Sources
The selection was inspired in part by an English-language guide from Creality on beginner projects. The texts, learning goals and safety notes are our own; print times are estimates. The photos are from Creality.